Showing posts with label DIY. Show all posts

Tuesday, October 20, 2015

DIY Paint Tube Decor for Your Relay For Life Event!


I made these really cool paint tubes to use as decor for our Relay For Life event, and when I posted this picture on Cancer Man's Facebook Page there was an overwhelming number of you who wanted to know how to make them!  Ask and you shall receive!


Don't worry- I will show you how to do the roller at a later date! 

To make things easier, I decided to make a video for you, which you can check out below! 


Here are the labels I used for this project.  To save, simply right click, and choose "save as" :) Each one is standard printer paper size so you can print them at home!


Have fun creating!

As always, with HOPE,
Cassi

Saturday, February 14, 2015

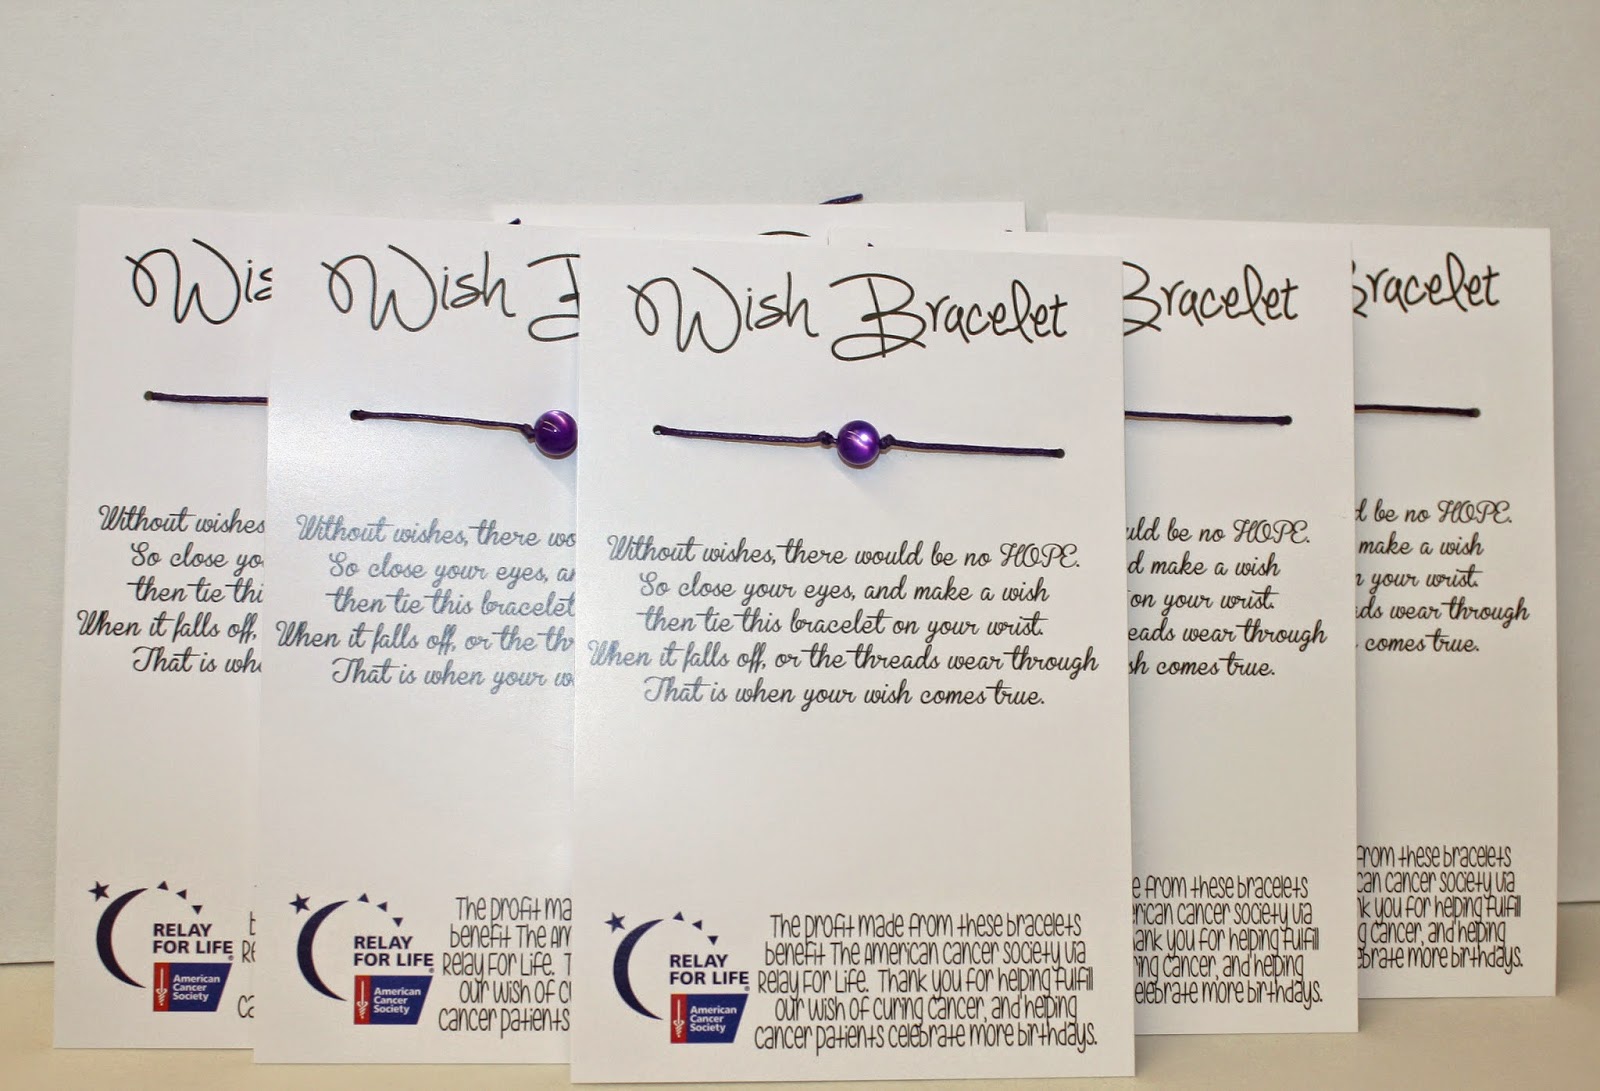
Relay For Life Wish Bracelets an easy DIY fundraiser! - revisited!

Note: This blog contains Amazon Affiliate links.  Why?  When you make your Amazon purchases through these links, a portion of your purchase comes back to me, and I turn around and donate it to RELAY!!!

This time last year, I posted about a super easy, cheap, and awesome fundraiser.  At the time, I thought I was just sharing a small handy idea, but it went VIRAL!  Since the original post, I have sold over 3,350 bracelets in the form of a DIY kit, so I thought it would be the perfect time to revisit, and repost the instructions!

I have learned since the first batch, that waxed cotton cord works WAY better for staying in place, and is easier to tie knots in- so you will not that change below :)

If you have ever spent time over in the orient, you know about wish bracelets.  The legend says that you tie one on (over in Thailand they are actually red string) and make a wish- when it wears off, your wish comes true!  Now, over the years I had completely forgotten about those cute little bracelets, until I went through some old boxes while organizing and found one!  And, as usual I said...

Oh!  There's a fundraiser in that!

I really do say that out loud in case you are wondering.  True story.

So anyway, I went to work figuring out how to make these little do dads, and it turns out- SUPER easy, and SUPER cheap!  So hey- what kind of Relay friend would I be if I didn't tell you how you can do it to?


Here's what you need (but remember- be creative- if you have something similar in your craft pile or can get it donated- even better!)


- 4 by 6 Cardstock (I chose to order postcards from Overnight Prints - it ended up being better quality than printing them at home)

- A hole punch (I like this one, because it punches small holes and looks really professional!)

- Scissors (UH PURPLE ONES!  Fiskars are my favorite, they last forever, and can handle being sharpened)

- 8mm round beads with a 1mm hole (I use purple cat's eye, but have found many people like multi colored ones)

- 1mm waxed cotton cord (the purple stuff in the photo above)
**note** if you are buying your stuff at a local craft store, hemp works well to!


OK, here we go.

This is so easy you are going to want to kiss me.

                                                     Thread both strings through your bead. 

Tie a simple knot on the right side of the bead (make sure it is centered)

 It will look like this when you pull it tight.

 Then tie another simple knot on the left side of the bead.

 Punch holes to string the bracelet through on your card.

String the bracelet through the holes you just punched.  Tie left over string in a bow in the back.

Now flip it back over and admire your handy work.  Isn't that the easiest thing ever!?!?


Not only are these awesome to sell as an easy fundraiser, but they would make great survivor gifts for your events (I have seen a few titled "A Survivors Wish").  And, if you don't have the time to make them yourself, I have a bulk pack listed on Etsy that you can buy for super cheap!  Happy crafting loves!
                        What little amount I make from the kits gets donated to Relay For Life!


Monday, April 28, 2014

Relay For Life Campsite Decorating and On Site Fundraiser Ideas

Hello Relay friends!  Relay For Life of Custer County has another GREAT year in the books ($132,000 event total!), and I am excited to share all of the awesome ideas from this years event!  Over the next few weeks I will be sharing them with you- but I want to start with everyone's favorite (according to my stats!) DECORATING and onsite fundraisers! To check out last years decorating, go here.

First things first- this years theme was Lights, Camera, CURE!  Life on the purple carpet.  Each team picked a movie, and we made sure there were no duplicates.  The teams were all really excited about this theme, because it could be so diverse.  Everyone really went all out!  If you are doing a movie theme, you can look here for theme ideas.

My team, The Mighty Misfits, went with a super hero theme- Super Heroes Unite to Finish The Fight! It fit us perfect since Cancer Man is on our team, and we have a lot of kiddos who Relay with us.  We all had a great time putting costumes together for the event.


 For our area, we used a plastic Starry Night Scene Setters roll to create stars behind our city scene.  This stuff couldn't be easier to work with- we just used magnets to attach it to our canopy!  We even had enough left over to cover the top of our pop up by taping it in place.  For the buildings, we used boxes covered with silver wrapping paper, and black vinyl to create the windows. 


On the other side I used a king sized sheet that I cut holes in and zip tied to the canopy (If I would have realized how easy the scene setter was, I would have used it for this side to!) Cancer Man brought his car (with working lights and steering wheel!) and we also put Cancer Man's purple phone booth to the side.  We made the phone booth by cutting a water heater box, and painting it purple. 


 One thing I didn't realize ahead of time is how much the adults would like the kids props!  If I could do it over again, I would have def. gone with a refrigerator box for the phone booth, so that the adults could fit to! 


 Next up we have the Etc. Shop's team- these ladies always do something really fun with decor, and the whole team gets involved!  This year they went with Willy Wonka- Wishing and Working at a cure factory!  It was complete with a candy bar for their onsite fundraiser!  These girls do something really neat with their canopy- they cover it with plastic table cloths!


 Next up we have the girls from IBC Bank!  This team is headed up by a set of sisters who REALLY know how to bring a movie theme to life!  Check out this Land Before Time decor!
 How cool is this!?  They used a projector to get the image on cardboard, and then traced and cut them out.  Then they painted them!  I can only imagine the amount of time that went into this.  Cathy told me they had been working on them since Christmas!
Then there is this little bit of brilliant.  To stand them up, they taped the cardboard to PVC pipe that was attached to weighted boxes! 
 
 They had a fun onsite fundraiser of S'mores!  They used little burners like caterers use to roast the marshmallows!

Last but not least is an idea for all of you salon owners out there.  Kadillac Barbies went all out by bringing the salon to Relay!  For a donation of $10 or more you could get an updo, or a massage!  They also offered Pantene Beautiful Lengths cuts- where girls with 7" or more to donate could get a cut and donate their hair on the spot!  For those of you that aren't familiar with this, Pantene makes high quality human hair wigs that they give to ACS for free for cancer patients!  


 Like what you see?  Be sure to subscribe for more awesome Relay ideas from a 20K plus TC! 


Saturday, February 8, 2014

Relay For Life Wish Bracelets an easy DIY fundraiser!


So I have a gem of an idea for you guys today!  If you have ever spent time over in the orient, you know about wish bracelets.  The legend says that you tie one on (over in Thailand they are actually red string) and make a wish- when it wears off, your wish comes true!  Now, over the years I had completely forgotten about those cute little bracelets, until I went through some old boxes while organizing and found one!  And, as usual I said...

Oh!  There's a fundraiser in that!

I really do say that out loud in case you are wondering.  True story.

So anyway, I went to work figuring out how to make these little do dads, and it turns out- SUPER easy, and SUPER cheap!  So hey- what kind of Relay friend would I be if I didn't tell you how you can do it to?

Here's what you need (but remember- be creative- if you have something similar in your craft pile or can get it donated- even better!)

- 4 by 6 Cardstock (I chose to order postcards from Overnight Prints - it ended up being cheaper and better quality than printing them at home)
-A hole punch
- 8mm round beads (I ordered purple cat's eye- fit the "Cancer Man" theme I was going for)
- 1mm cotton cord (the purple stuff above)
- .7 mm silver nylon beading cord
**note** if you are buying your stuff at a local craft store, hemp works well to,  You don't HAVE to have two cord colors, that is just what I went with!

Here is the usual disclaimer about my fingers.  I make tie dye for a living- seriously.  It's my full time job!  So, yes, my fingers look yuck.  Today I made Girl Scout shirts, so they look green.  If you want to see pretty manicured blogger fingers- you'll have to go somewhere else! HA!

OK, here we go.

This is so easy you are going to want to kiss me.


  Thread both strings through your bead. 
Tie a simple knot on the right side of the bead (make sure it is centered)
 It will look like this when you pull it tight.
 Then tie another simple knot on the left side of the bead.
 Punch holes to string the bracelet through on your card.
String the bracelet through the holes you just punched.
Tie left over string in a bow in the back.
Now flip it back over and admire your handy work.  Isn't that the easiest thing ever!?!?


Not only are these awesome to sell as an easy fundraiser, but they would make great survivor gifts for your events (I have seen a few titled "A Survivors Wish").  And, if you don't have the time to make them yourself, I have a bulk pack listed on Etsy that you can buy for super cheap!  Happy crafting loves!
UPDATE 6/09/14
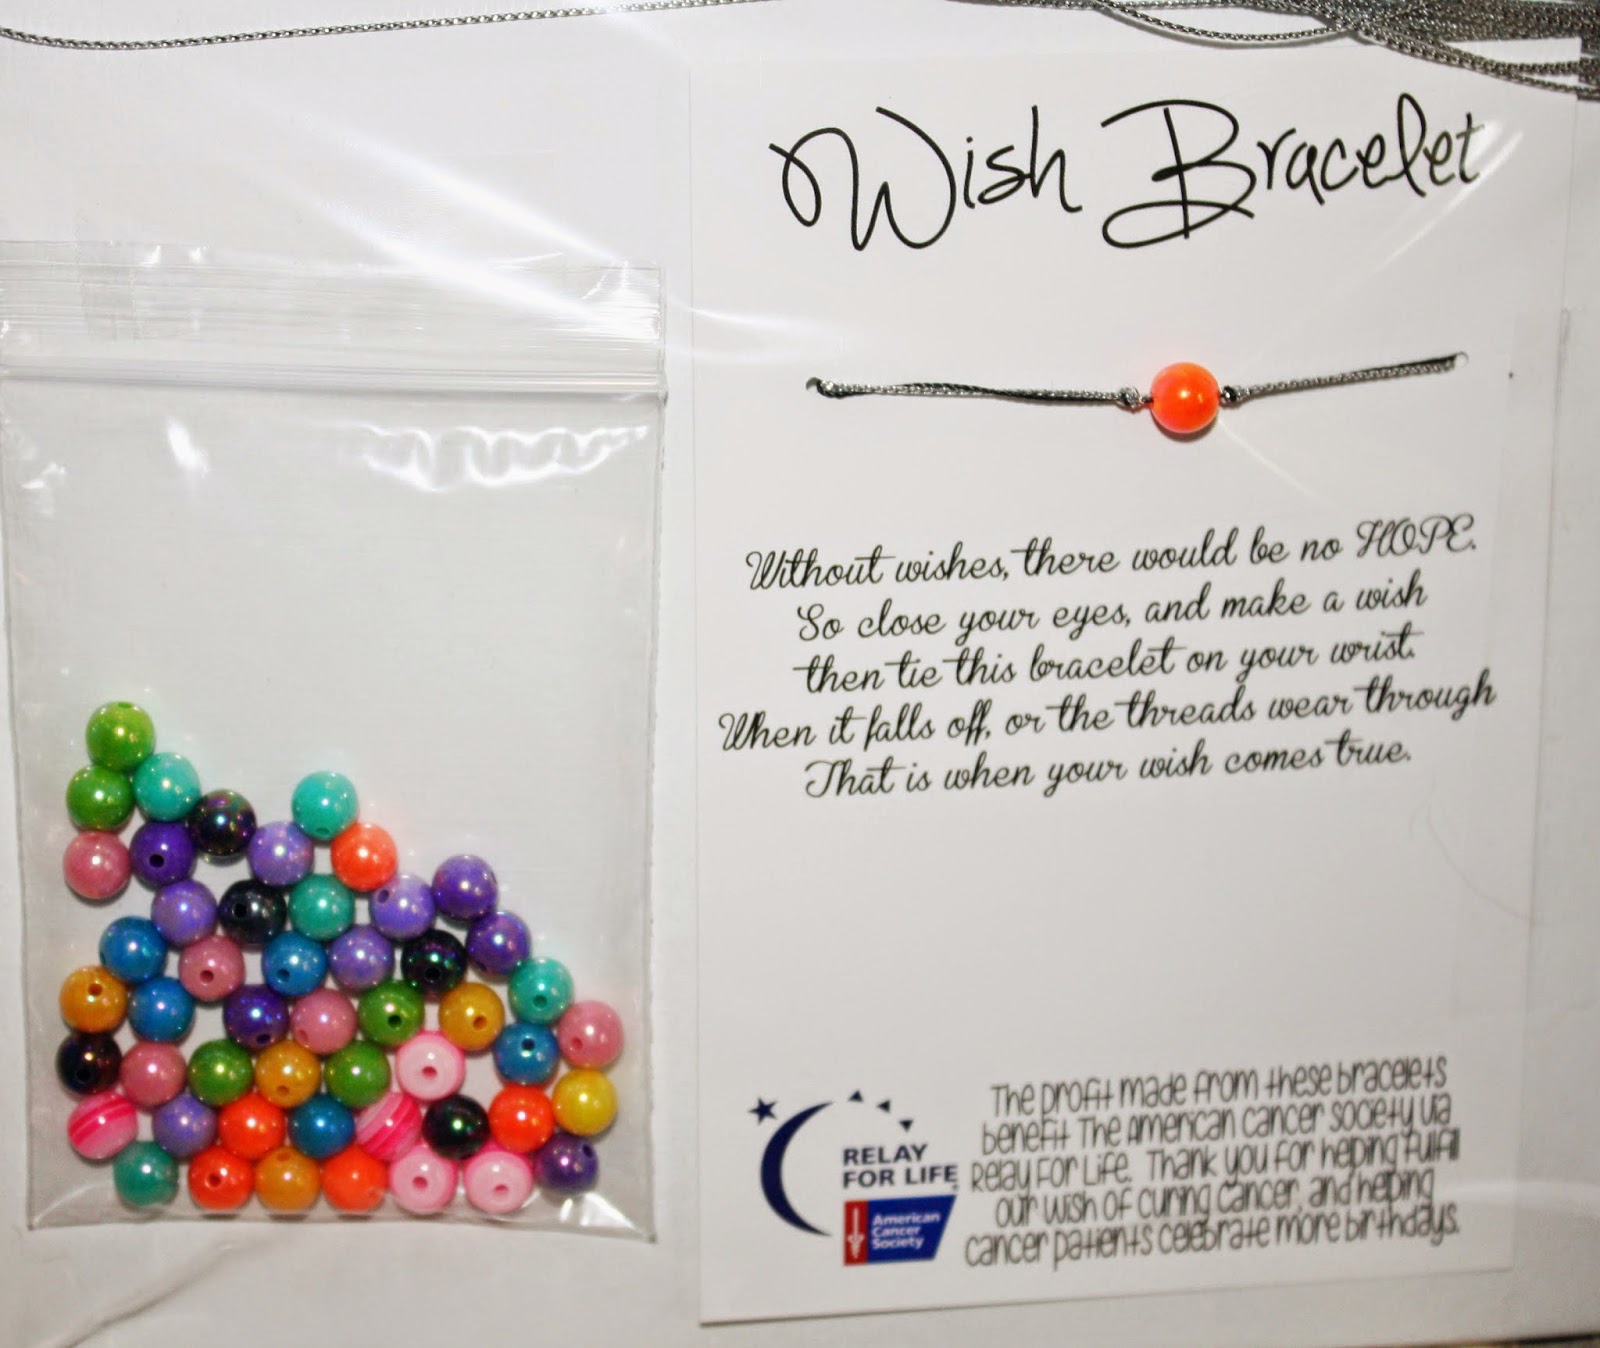
Due to popular demand I have added DIY kits that include everything you need to make 50 bracelets!
Find the purple kit here!


                      Find ready made purple bracelets here!