Thursday, January 31, 2013

How to help your little one make a BIG difference!

It's RELAY SEASON!  In our house, Relay Season falls from January 1st, through mid April- and we literally celebrate it like it is a holiday.  Except, Relay season is better than a holiday, because instead of GETTING- we spend it giving, and raising money to make other people's lives better!  The best part about this time of year for me is seeing how passionate Wes (who is 6) gets about fighting back against cancer.  Being a parent of a little philanthropist takes a lot of creativity.  Mainly, because it is important to teach them that they can do SO MUCH, with the skills and the tools that they have available!  Teaching kids to do good things like volunteering and paying it forward at a young age (and making it fun!) will help them learn that doing good as an adult is NOT a chore, but something that makes you feel wonderful!

Now, not to toot my own horn or anything- but I like to consider myself the guru of teaching kids to have fun while fundraising and giving. Today, I want to share my best tips and ideas for  making fundraising for any event or charity a fun thing for kids!

But first- let me tell you about the amazing benefits of having a child that learns to give at a young age.  Did you know that children who are taught to help others at a young age become more resilient adults?  Why?  Because, they learn that they are not the only ones with problems, and they can bounce back easier from whatever is thrown their way! Volunteering teaches children about passion, and responsibility, and helps them learn to be thankful for what they have.  And, according to a recent study by World Volunteer Web “youth who volunteer are less likely to engage in risky behavior, are more likely to feel connected to their communities, and tend to do better in school.”

Now, in my opinion- leading by example is the key to success.  So, find something that you can all get excited and passionate about.  It makes the experience that much more amazing!  If you are not already volunteering or fundraising- here are a few reasons why YOU should do it from The John Tesh Blog!
  • First: You’ll live longer. Researchers at the University of Michigan tracked over 1,200 seniors for a decade. The result: Those who volunteered on a regular basis were 40-percent more likely to be alive at the end of the study. That’s because volunteering increases the levels of hormones that help cells repair themselves. 
  • The next benefit of volunteering: The “helper’s high.” Dr. Stephen Post is the author of The Hidden Gifts of Helping. And he says just thinking about doing a good deed causes your brain to release the feel-good chemical dopamine. And helping others releases so much mood-boosting serotonin that it’s just as effective as some medications at treating depression.
  • Another good reason to volunteer: You’ll feel better about yourself! In one study, people with multiple sclerosis were trained to provide compassionate support over the phone to fellow MS sufferers. The result? The helpers were more self-confident and reported higher levels of self-esteem.
  •  Finally: Helping others improves relationships. Dr. Stephanie Brown specializes in preventive medicine. And points to research on people who take care of a spouse suffering from Alzheimer’s disease. No matter how challenging things get, if there was love and caring in the relationship to begin with, the caregiver develops even stronger feelings of love and compassion for their ailing mate.
Are you pumped yet?  You should be!  Let's get on to the fun part! 

When working with kids, it is important to include them in every aspect of the fundraising or volunteering.  For us, American Cancer Society's Relay for Life is the perfect fit.  Since Wesley's Poppy died from cancer, and we know NUMEROUS survivors (and even other kids who are fighting cancer!) it is something we can do to feel like we are fighting back!  You want you child to understand WHY they are doing what they are doing- which may seem hard to do with a 5 or 6 year old.  But fear not- as a parent, you know the best way to communicate things with your kids!  Here is a GREAT example from my best friend (who's daughter, Kenzy, is my sons BFF, girlfriend- and in his mind- future wife)
 
Kenzy - " Momma you mean even kids could have caner"
Mel - "Yes baby even kids can have cancer"
Kenzy - "So we can give our money to all of the kids who are sick and then they will be all better"
Mel - "Do you want to do Relay for Life for kids who have cancer"
Kenzy - " UUmm I think so because kids should not have cancer"

After you talk to your child about what they want to do- get their ideas on how they want to do it!  You will be amazed at the ideas they have!  Kids love to see their ideas come to fruition, and it shows them that they truly CAN do this.

Now, if you are doing an event like Relay for Life- it is time to rally the troops, and ask your friends (and your kids friends) if they would like to join you!  Why?  Volunteering is more fun when you are doing it with the people you love!  Luckily for me, Mel, my best friend, is equally passionate about making a difference for others, and we fuel each others fires when it comes to brainstorming, and fundraising!  We joke that we should have T-shirts that should say "Warning: this momma is in RELAY mode!"  The best thing about this is our passion transfers to the kids, and they start getting REALLY excited about what we are doing together!
Wes and Kenzy working on a Relay poster together

Now, you have a plan- you are excited, and ready to make a difference!  Here are our favorite ways to raise money!

Letter Writing
Sit down with your kiddo, and have them write a letter to potential donors.  It doesn't have to be long or eloquent- just your child's words on why they want to make a difference, and how they are doing it.  Remember to be flexible, and let them have fun with it!  Draw pictures, use stickers- you name it!  Here is the mommy works smarter not harder part- make color copies of the letters, and mail them to every person you send a Christmas card to.  If you are doing Relay For Life- take the letters to your local chair, and they will send them to ACS for mailing- they will cover the postage! 

Here is an alternative method that will help with writing skills!  Mel has Kenzy write one letter a day as "homework"  (she is in kindergarten) which helps her work on sentences, spelling, and letter placement :)

If you are on facebook, instagram, or pinterest- share the letter!  You should be proud of what you are doing- and there is no shame in showing your child's amazing work off! 

It is important to me to make sure Wes properly thanks all of the donors who send him a donation online, or in the mail.  So after school each day, we have a special time where he sends thank you emails, and letters to all of the people who have helped him! 

HUGS FOR SALE!
This is by far Wesley's favorite fundraiser!  Why?  He gets to tell people about what he is doing, hug people all day, and spend time with his friends!  The great thing about selling hugs, is it is something kids can do with the resources they have- their big hearts!  Contact a local store, and find out if they would be willing to let you stand outside of their business to sell hugs.  Chad Nabors of Nabors Shoe Center is always generous about letting us do this, and even posts about it on his stores facebook page to help us get extra attention!  Tell everyone you know what you are doing- you will be amazed at how many people show up for hugs!  Let your child color a poster to hold- after all, this is THEIR big  event! 


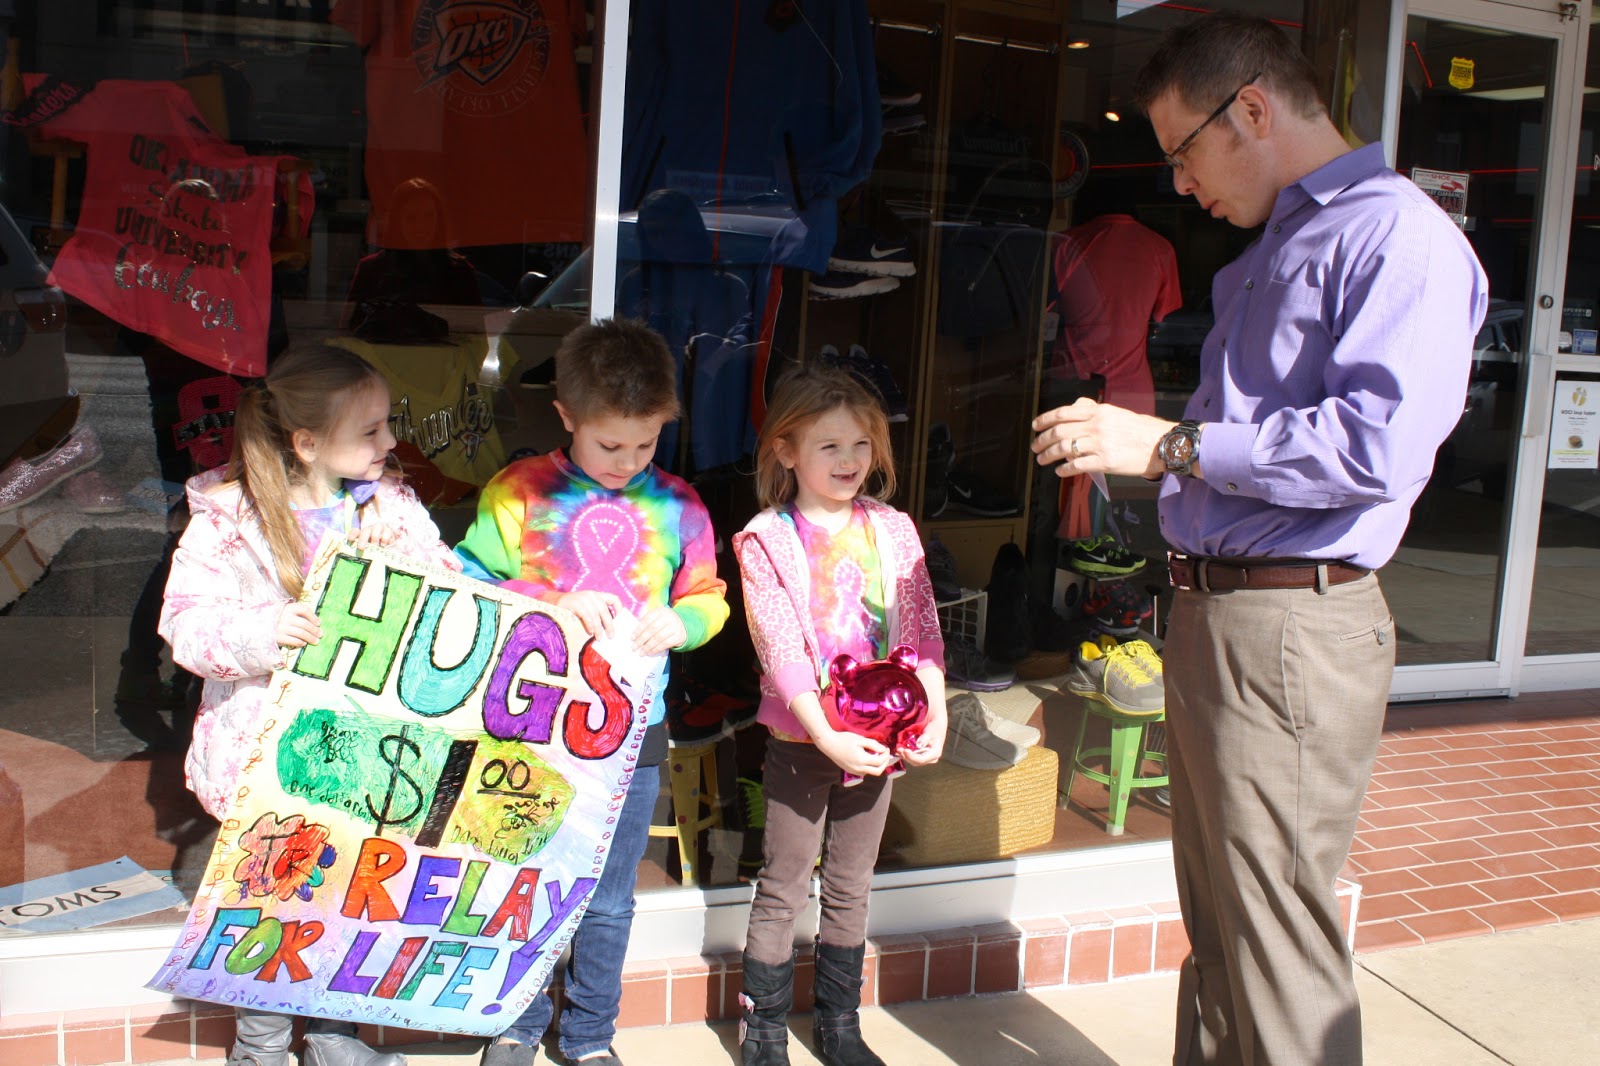
A little something we learned doing this in previous years was that a lot of people don't carry cash.  To help this problem, I made the kids cards up on 4 by 6 photo's (which I then cut in half) so that they could hand them out to people who wanted more information, couldn't donate right then, or didn't have any cash on them.  The kids also learn a lot of great lessons while selling their hugs.  How to be polite and respectful when asking for something, saying thank you when given something, and how to deal with rejection when someone doesn't donate. 

A Date With....
Now, I have to say that I can not take credit for this next idea, but it is genius!  My friend Cheryl Smith is a Community Development Director for The American Cancer Society (or as Wes calls her- The BIG Boss of Relay).  After seeing the letter Wes wrote on facebook, she emailed me and said she would donate to Wes if he would go on a breakfast date with her!  He jumped at the idea!  Not only did he get to raise money for his goal, but he got to spend some very valuable time with someone who wanted to hear all of his ideas about raising money, and why he wanted to do it.  His date ended up lasting two hours, and he enjoyed every single minute of it!

Well friends, I just realized that I have written what is the start of a novel! HAHA!  I have so many more exciting ideas to share with you!  Stay tuned for my next post coming soon!  Remember- little kids can make a HUGE difference!  Happy fundraising! 

To find a Relay For Life event near you, please visit http://www.relayforlife.org !

XO
Cassi 

PS- if you enjoyed this post and would like to help Wes reach his goal of raising $1000 for Relay for Life, please visit Wesley's Relay page!

or to help me reach mine check out my Relay page!

Sunday, January 13, 2013

Red Velvet Bliss

With Valentines Day right around the corner, I thought it would be fun to create a new twist to my Peanut Butter Bliss Pie recipe, and share it with my favorite people!  By now you all know about Red Velvet obsession, so when Wes suggested a Red Velvet Bliss when we were brainstorming ideas- I was pumped!  So yesterday Wes and I perfected the recipe to share with you today (and trust me, it's to die for!)  The best part?  It is so easy!


Here is what you need:
-8 oz Cream Cheese
-2 TBS Whole Milk
- 3/4 cup Confectioners Sugar
-One container of French Vanilla Cool Whip
-Pre Made Pie Crust (I love using Oreo crust!)
-2 cups of Red Velvet cake mix (which is about 3/4 of a package of mix)

Now, just a quick note on ingredient quality.  I personally believe that to make the best baked goods, you should use the best ingredients.  However, my husband disagrees and tells me constantly that "value brand" products are often made at the same place that makes my name brand products, so it is up to you!  Every budget for every family is different, so do what works best for you!

First, combine and mix the cream cheese with 3/4 cups of the confectioners sugar
*TIP* let your cream cheese and cool whip sit at room temperature for about 30 minutes before mixing, it will make it softer and easier to combine!
Next,  add your two tablespoons of milk, 3/4 of your container of Cool Whip (you'll use the rest for the topping), and 2 cups of Red Velvet mix.  Beat until well combined.  You will know it is done when your cake mix lumps are gone! 

Then, spoon your mixture into your ready made crust.  Yes, I am serious- this pie really is that easy!
Next, top your pie with the remainder of the Cool Whip, and any other toppings you want to use.  I usually add a little chocolate drizzle, just because it looks pretty!  To get the pretty peaks, just use an icing piping tip :)


Now, here is the hardest part for me.  Put the pie in your fridge, and chill for two hours before serving.  I am always HIGHLY tempted to just grab a spoon and start eating right away- but you have to wait it out!

Here's the coolest thing about my little recipe- if you are not a red velvet fan, you can easily substitute another kind of cake mix.  For example- Wes wanted M&M pie, so we used chocolate cake mix and mixed mini M&M's into the batter, and used them to garnish the top.  Your possibilities are endless!

The other thing I love to do is make 3 at a time, so I have one to eat right away, and two to pop in the freezer for guests!  They freeze really well, and are super easy to dethaw in the fridge when you are ready to eat them.

And voila!  Now you have a super easy RED Valentines treat, that only takes about ten minutes to whip up :)  Happy creating!
XO
Cass

Tuesday, January 8, 2013

Valentines Decor!

Last weekend my best friend Mel and I were on a mommy shopping day.  Our mission?  Find decor for our mantles for Valentines Day!  But, at the end of the day- we went home empty handed.  I told Mel- either I am getting too picky, or there just isn't good stuff out there that isn't cheesy.  My solution?  Make the decor myself of course!  Today I am going to show you how I made a cute wire decor for my mantle.


 Here is what you will need:
-Wire
-Wire Cutters
-A marker or something round like a dowel
-Hot Glue
-Scrapbook Paper or paint
-Modge Podge
-A piece of Wood (I like to use crown molding)

Now, I started this project with a specific quote in mind.  I wanted to use the Beatles lyric, "All you need is love, love is all you need."  I just wasn't sure HOW I was going to get it up there.  I went into  Michaels with the thought of buying wooden letters and painting them.  But- HOLY CANOLI at a $1.50-$1.99 per letter, that was WAY too expensive for 5 weeks of decor.  Then I stumbled upon some Christmas wire that was 80% off!  Now, I have never done ANYTHING with wire before, but I figured I would give it a shot!
I went home and got to work.  I was cutting and bending wire like a mad woman!  Here is what I ended up with-
OK- now to the fun part.  Here is how I bent the wire (the example below is of me making a heart for the center)

Start by cutting a piece of wire to work with- 

Next, to make the bottom of the heart, I folded the wire in half, and gently crimped it with my wire cutters (be careful not to push too hard or you will cut it!) to create a nice bend.

The comes the fun part!  Start bending the wire how ever you want to form your shape (or letter)

To curl the ends, simply wrap the wire around a marker, or a wooden dowel.


And before you know it- your shape is done! 


Now you have all of these fun shapes and letters that you can use to decorate however you want.  Glue them to wreaths, hang them from ribbon- you name it!  I decided I wanted mine to stand on the mantle, so my next project was to glue them to wood.  I wanted something different from a solid color- so I modge podged my wood to make it different.  Here's how you do it:


Cover your wood with modge podge while your paper soaks in some warm water (the warm water softens the paper enough to make it easy to work with!) 


Next, lay your scrapbook paper on the wood, and gently fold it into creases, and over the edges.  When you are done, add another coat of modge podge.


Now you have to be patient and let it dry!  The hardest part for me :)When your wood dries, you are ready to add your letters!  This part is easy peasy, just hot glue the bottoms, and put them where you want them-


Now, here is the part that is NOT so easy- the decorating part (DUN DUN DUN!!!) Now, this is the thing that makes me different than your average blogger.  I'm not perfect- and I am not an interior designer!  So, as you are decorating any space- just remember it is ok to mess up- do something and then change it, or make multiple trips to the craft store :)  Just remember- if you get frustrated, walk away for the rest of the day.  When you look at it the next day with fresh eyes, you will have a new perspective. 

So, I started this project wanting to use black flowers- I looooove black.  No clue why, but I thought black flowers with some red and white mixed in would be really cool!

But, dang it!  It just didn't look right- my letters were hard to see.  So back to the store I went, to buy white flowers.  I started by pushing them right up against the letters- 

Then I realized Chad would be upset that I was blocking the remote receiver, so I scooted them back a bit, and voila!

Here's the full mantle- (I promise the words show up better in real life- HA!)

So now you are all set to make some awesome wire decor.  Go crazy and make letters for your kiddos room, your kitchen, your living room, or whatever!  And tag me in your pics when you are done!

XO
Cass

Tuesday, November 6, 2012

My story

 So, I have been working on my about me section in my shop today, and I figured I would share it with you guys to.  It was a little painful to write, and to think about where I was ten years ago, but I think it is good to tell my story, because it may inspire others- what do you think?

I'm Cassi, and I have made over 8,000 garments out of my bathtub.  No kidding!  I want to tell you my story in hopes that it inspires you to follow your dreams.

I never knew what I wanted to be when I "grew up".  To be honest, I felt like my options were pretty limited.  The expense of college was not something my parents could undertake, so I graduated high school at 17 (a year early), and moved to the ghetto of OKC (the only place I could afford to live on my own), and worked at Kmart.  A few years later, Kmart closed, so I went to work for Walmart.  Even then, I knew that I did not want to be there forever- there had to be something better for me out there, and my life was not meant to be spent slaving away for a large corporation for crap pay.  It was like an endless cycle though- when you can barely afford to eat, how can you pull yourself out?

I have always had a creative soul- in fact, during those hard times, being creative and artistic was about the only thing I could do to find a break from the hard times around me.   I spent a lot of time painting- I would paint just about anything I could get my hands on.  The other thing that got me through those rough times was volunteering, and giving to others in anyway I could.  It made me feel like even if times were hard for me, I could still make a difference.

I got married young, and even though that was NOT a smart idea, I got the best gift I could ever ask for from that relationship- my son, Wes.  When I found out that I was pregnant, I started dabbling in tie dye- it was a fun way for me to make something really neat out of things that I already had around the house.  I didn't have anyone to teach me, so my creative personality kicked in, and I spent hours testing and trying new things- never in my life could I have imagined that I was giving myself an education for what would eventually become my career.

In 2007 I found myself a single mom of a one year old son.  As fate would have it, I ended up falling in love with a hot shot manager from Arkansas.  We had met when I was pregnant with Wes, and became fast friends.  He was my age, a bad boy, and NOT the kind of guy you would ever consider settling down with.  In a strange turn of events, we seemed to make each other better people just by being friends.  When we started dating, we were the oddest couple- no one who knew either of us would have ever put us together- we were complete opposites.

Chad saw the artist in me, and encouraged me to follow it.  "Why not?" he would tell me.  So, I went back to my tie dye adventures- spending every extra penny I had on supplies.  I begged anyone and everyone to look at my work, and to buy stuff from me.  I started trying new techniques that I thought MIGHT work- and refined, and practiced.

My sister had told me about this website called Etsy- as she described it- it was the most amazing thing ever- all handmade, and perfect for people like me.  Chad suggested that I try it- just to see what would happen.  I specifically remember saying, "No one who doesn't know me is going to buy my stuff."   When I got my first Etsy sale, I literally thought I had broke my computer, or something was wrong- where did this money come from?  When I realized that I had actually sold something- to a stranger, no less- I took the money I had made and invested it right back into my creations.  Thanks to word of mouth, my shop was getting steady sales, and with each new order, I got  better- I was determined to refine my technique, teach myself how to do new things, and to make my clothing something that people would love.  I wanted to break the barriers that tie dye held- I wanted to make clothes that were gorgeous, and unique. 

The hard work paid off- before I knew it, my shop was keeping me busy full time, and I was living the life that I was determined to get!  In turn, this gave me more time to fulfill my other passion- giving.  Life was good- people recognized me when we went places- specifically Walt Disney World.  We would get stopped, and people would ask me to sign their autograph books, and take pictures- it was an amazing feeling.

Now, you think this is my happy ending- but it is not.  You see, I made a stupid mistake when I opened up my first shop.  I was selling TONS of Mickey Mouse tie dye- everyone loved them.. well, everyone except for Disney.  I woke up one morning and found that my shop, and everything I had worked so hard for, had been shut down for copyright infringement.  This fueled my creative fire- instead of giving up- I started over and reinvented my line.  I thought my dream was over, but I refused to quit.  After a few VERY scary weeks, my new line caught on like wild fire, and that leaves us where I am today :)

If you have a dream- FOLLOW IT.  If you want to change your life- CHANGE IT.  It won't be easy, and it feels scary, but you will never know until you try!  You might just find your ONE  GREAT THING :)

To check out my current "good works" projects- check out http://www.cassiselby.com , or find me on facebook at http://www.facebook.com/onegreatthing

XO
Cass

Wednesday, October 17, 2012

Yummy Mummy Drinks

The following conversation REALLY happened between my 6 year old son and I a few weeks ago....

Wes:  Mom, can we have a Halloween party? 
Me:  That might be a good idea, we can think about that.
Wes: Good- because I told my whole class yesterday that we are having a Halloween party!

So!  We are having a Halloween party for Wes and all of his little friends.  Now, if you know me, you know I can't just have a simple Halloween party, I have to have (what my husband lovingly calls) a Halloween party on steroids! 

I thought it would be fun to share some of my crafty projects for those of you that are planning Halloween get togethers as well.  I always make sure my projects are kid friendly, because crafting is more fun when you do it with another person, and my little helper is always Wes!

Today I am going to show you how to spruce up some boring juice boxes and turn them into fun mummys!


Here is what you will need:
-1 roll of white Duck Tape
-Sticky eyes (I bought mine from Oriental Trading )
*Note- you could use googly eyes to, but to me, hot glue and a 6 year old is an accident waiting to happen.
-Juice Boxes (I get Juicy Juice, because they have Box Tops, and the school collects them)


Step one.. remove all of the straws from the juice boxes (you'll want to use them to drink with later after all!)
Next, you will want to get your Duck Tape ready... You will want to leave some pieces big for the bottom, and tear some of the others in half to make wrapping easier for little hands...
Wrap the bottom part of the box with a regular (untorn) strip of Duck Tape- it makes wrapping the rest easier.

 Then continue wrapping the box in any random way you want until it is covered.. just remember to leave an opening to put the straw in later!


Last but not least, add some silly sticky eyes to finish off your mummy!
That's it!  How fun and easy is this project?  Now go get crafty!
XO Cass